Hello how the hell are you and if this is your first time here thanks for stopping by y’all. In this blog we are going to talk about the exposure triangle and how it will help you understand your camera better. The hardest thing that I had to figure out when I first started shooting was how to get that perfect exposure. This started with me going to Google and YouTube to try and figure it out. The issue that I was having is all the articles and videos were using all the technical terms that I just didn’t understand and still have a hard time with to this day. You see all the people in our industry are about knowing more than the average person and I am that average person so you can see the issue that I was having.

It took me watching a video by Jared Pollin (FroKnows Photos) on YouTube to really understand it better. His method for this was a simple as take the photo in full auto then put the camera in manual mode and set the settings to the last image you took. This gave me the best understanding on how to get the perfect exposure because it was stupid simple which is how I roll. At this point I had the basic concept down so now I could understand what the technical terms meant. Now I could put things together in my head so I could be out shooting more in manual mode.
How did I put the technical terms in my head? That was simple I used my eyeballs, eye lids, and glasses into the mix. This sounds odd right but let me explain and that will help you “see” things from my point of view. The human eye is just a camera and the way that it works is really simple. In fact it is stupid simple once you understand it. Let’s start with the iris and how that works for capturing the light coming in. You see the iris is the area that controls the depth of field and the amount of light that you get into your eye. The smaller the iris the more you can see during the day just like the aperture on your camera. The smaller the aperture/f-stop the larger the depth of field is going to be so more is in focus. This also means that you will have less light coming into the lens. See how the iris is the perfect example on how our eye capture the light.

Next we have the eye lids which is, you guessed it, the same as the shutter on the camera. The faster you close your eyelids the less light you get into your eyes. This works during the day you want that faster shutter speed to get enough light to see what is going on but they close fast enough to stop motion. During the night or low light you will have to keep your eye lids open longer to get more light to see in the dark. This brings us to the iso which is the glasses for your eyes. You see the glasses allow you to put sunglasses on during the day which means that your eyes are more sensitive to the light right.
This is exactly how iso works on your camera. This is the area that allows you to truly see in the dark. The higher the iso the more you can see in low light. During the day you need the lower iso which is like putting on a pair of sunglasses. You can still see but everything is darker but it is also clearer for you to see the details in the area you are at. They all work together just like your eyes and it all happens in the blink of an eye. Once you understand how the exposure triangle works you will be taking images like no other.
The true key to understanding the exposure triangle is just knowing how you want the image to look. Do you want the image to be sharp from front to back use the larger f-stops and you will be able to get that. Do you want the blur in the background for a portrait use the lower f-stops for that. Do you want to freeze your kid running to give you a kiss after they have just won the game use the faster shutter speed. Do you want the silky smooth water from the waterfall then use the slower shutter speed? Do you want to be able to see in the dark use the higher iso to give you night vision? Do you want the the cleanest image with no noise use the lower iso’s to get that clean image?

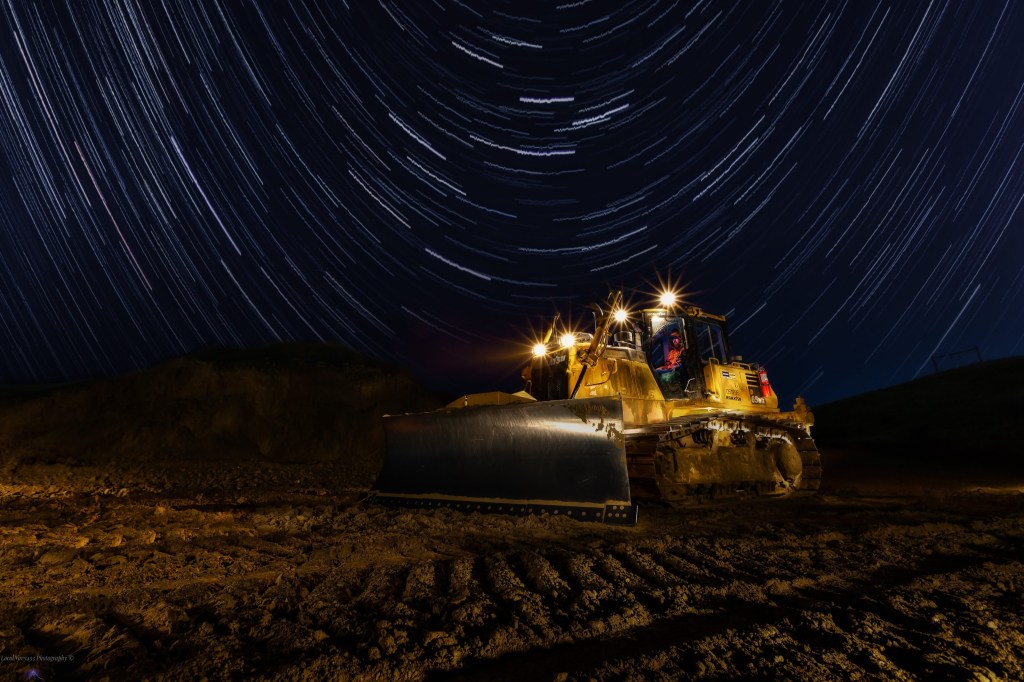
They all work together and knowing how they work to get the type of image that you want is key to getting the right exposure. There is a balance in this to achieve the perfect exposure. If you are using a larger f-stop you need to have a slower shutter speed during the sunset or sunrise and keep the iso at 100. If you want to see the stars at night and take that photo you need a higher iso with a lower f-stop and a super long shutter speed. The best trick is to take the photo in full auto (minus the flash) look at the setting then try to match it. This is the fastest way to understand exposure let that camera you paid a lot of money for teach you how to get that perfect exposure.
Thank you for stopping by and enjoy the rest of your day. The best way to truly learn photography is to take what you learned here and go out and try your hand at it. Take a photo a day to practice it will make you better I promise y’all.

Leave a comment