Hello and how the hell are you? If this is your first time here thanks for stopping by. In this blog we are going to talk about three tips that will help improve your landscape photography. The internet as a whole is filled with tips and tricks to help you get better landscape images. So why should you listen to me. That comes down to the fact that I have tested these tips and use them all the time when out in the field shooting. The reason that there is only three tips is due to the fact that it will give you the best chance at getting a good photo. The typical types of tips for this type of article would be leading lines, rule of thirds, and composition.

What sets my tips apart is due to me researching what are the best tips trying them and weeding out all the ones that make no sense to me for shooting. I mean we all have read that we need to use leading lines to connect and lead the viewer through the image. So that tip is not one that I want to go over today. While I use it all the time I have grown bored with looking for them all the time and putting them in all my images. You can only have so many leading lines in your images. Then there is the fact that all your images look like everyones images.
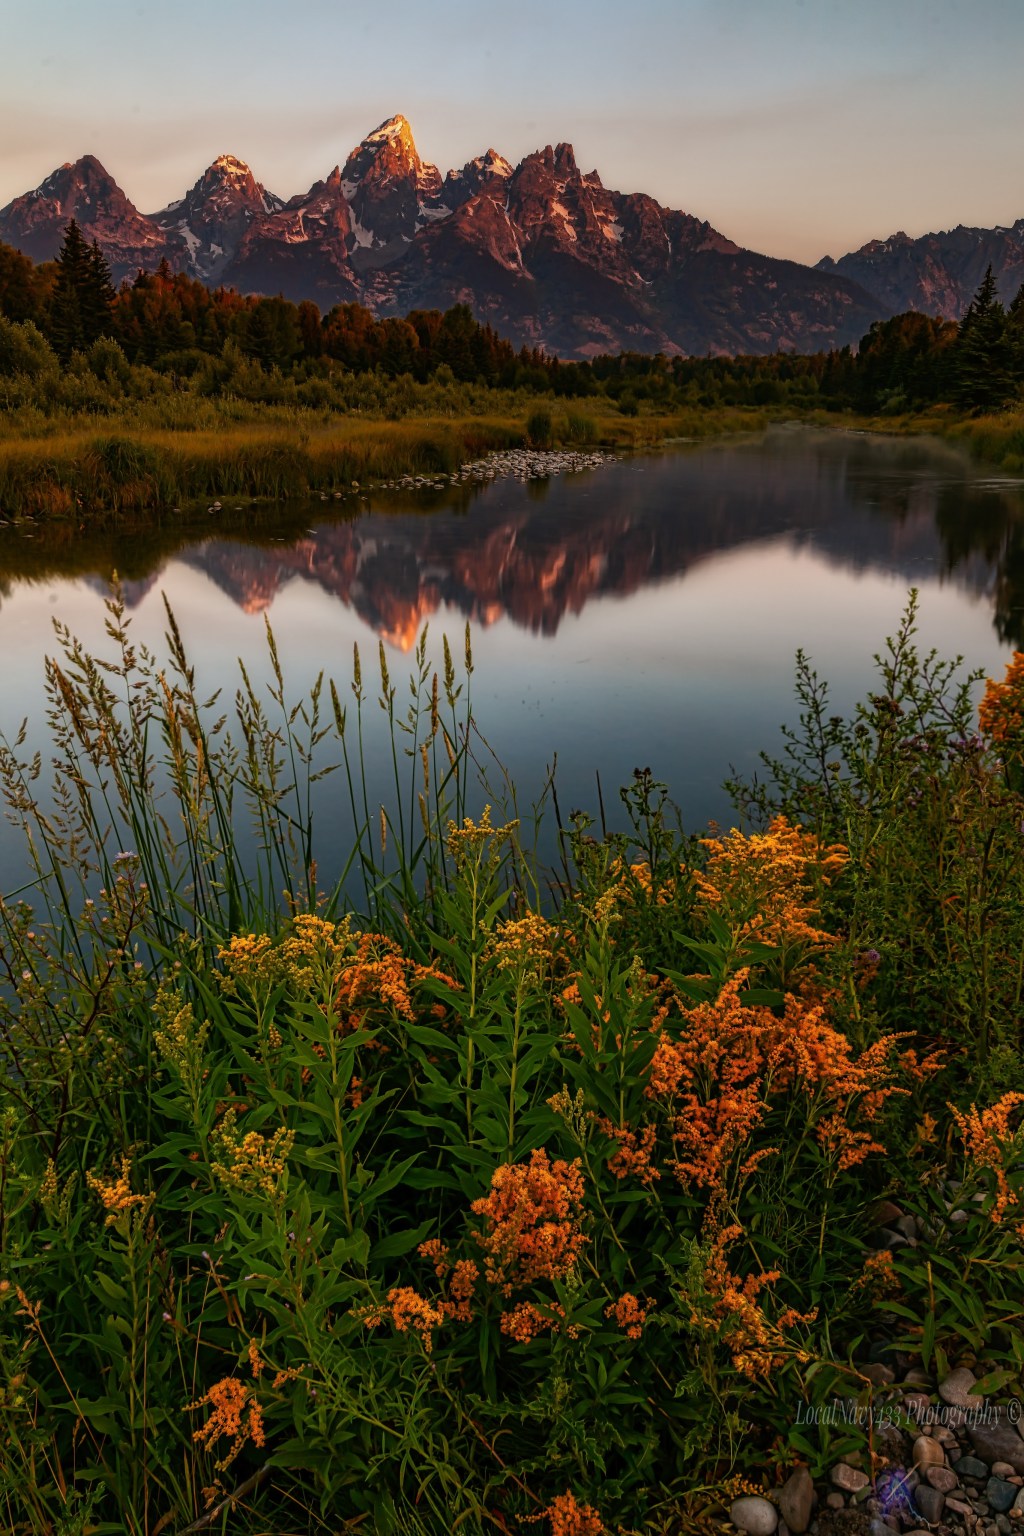
The first tip that I have is to place the subject in the mid ground of the image. This allows you to build the comp around the subject. For example, I will go out to shoot with a subject in my mind like a tree. Where I live there is a crap ton of trees to shoot but they are not easily singled out due to the fact that they are all the same height and so close to each other. So how are you going to separate them you ask. That is going to be given in the next tip so keep reading. Once you found the subject you need to search around the scene to get some good foreground interest to lead the viewer to the subject. This allows you to have the comp pretty much finished for your image.

Now that you have your foreground and your subject in the middle the background of the image is either going to be a mountain or the sky both work. If it is going to be the sky you need to figure out how to make the subject stand out more. At this point you need to decide what focal length you are going to shoot at. This is going to be where you take a challenge and only bring one lens to shoot with to make you think of different ways to shoot the subject. I love doing this because if forces you to really think about how to work the scene better.
The second tip is shoot with only one lens as it will help you see the world different. I like to take my 11-16mm lens and build my comp around shooting a small scene with a super wide lens. This really helps me with getting the shots that I love. I don’t like shooting the wide vistas anymore as I find them too easy to shoot. I mean you walk up to your vantage point on top of a hill or mountain and yes you get the whole scene in but you are missing the small details that truly make that vista worth going to. They call this intimate landscape photography and after looking back through all my images I am really drawn to this type of photography.

I take the 11-16mm and build my comp as if I was shooting that vista. I have my subject in the mid-ground and then a good foreground and at this point I will use the sky as my background. I have the three elements for a good comp in a close and intimate scene. Once you have the comp lined up you need to figure out at what perspective to shoot this wonderful scene at. If you go high you end up with a lot more in then background which takes away from the sky. If you go at eye level you run into the image looking like a snapshot.
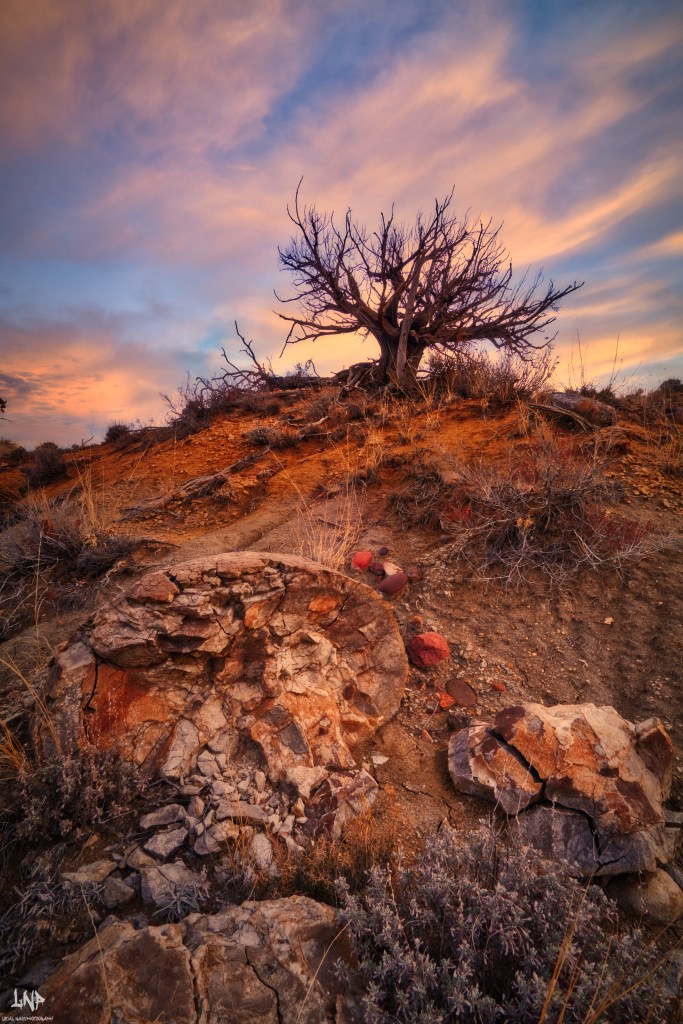
The last tip is where you will make your images stand out more than other. You need to get low and focus stack the image because you are going to be super close to the foreground of your comp. I have found that by doing this you can truly showcase the subject. This also allows you to really add the sky into a photo and make it more pronounced. I usually put the top of the tree on the top third of the frame which allows me to truly give the tree some breathing room.

Once you put all three of these tips into practice you will start to notice that you are seeing the landscape in a different way. I found that I was looking closer at the landscape giving me more to shoot and see. Yes the grand vista are cool but they are easier to grab an image and that I feel holds you back from growing as a photographer. This was the challenged that I faced when moving to AZ which is lacking in the huge mountains like Wyoming had. While I love the state that I live in now to me is was lacking at getting the truly great images that I was getting in WY. Now that I changed the way that I shoot I am seeing more and it gives me so much more to shoot as well. Thanks for reading this and I hope to see you on the next blog enjoy from St Johns AZ y’all

Leave a reply to localnavy433 Cancel reply